Optimizing
storage on Mac
Managing disk space on a Mac is essential for preserving its speed and performance. The accumulation of files such as music, movies, apps, and various other data can quickly lead to insufficient disk space, resulting in reduced system efficiency. This article shares tips to declutter and optimize your Mac’s storage.
Utilize Virtual and Cloud Storage Solutions
One of the ways to alleviate the strain on your Mac’s disk space is to embrace virtual and cloud storage options. These solutions offer not only temporary relief but also long-term benefits. Reducing the load on your physical storage ensures that your Mac operates smoothly. Moreover, cloud-based storage guarantees the security of your data.
While many people primarily use online storage for photos, it’s important to note that virtually any file type can be stored securely, be it music, videos, pictures, documents, or any other file category.
We recommend activating the “Store in iCloud” feature to automate the uploading of files to iCloud whenever your disk space is running low. To enable this feature, follow these steps:
- Open System Settings.
- Navigate to General → Storage.
- In the Recommendations section, click the “Store in iCloud” button and confirm.
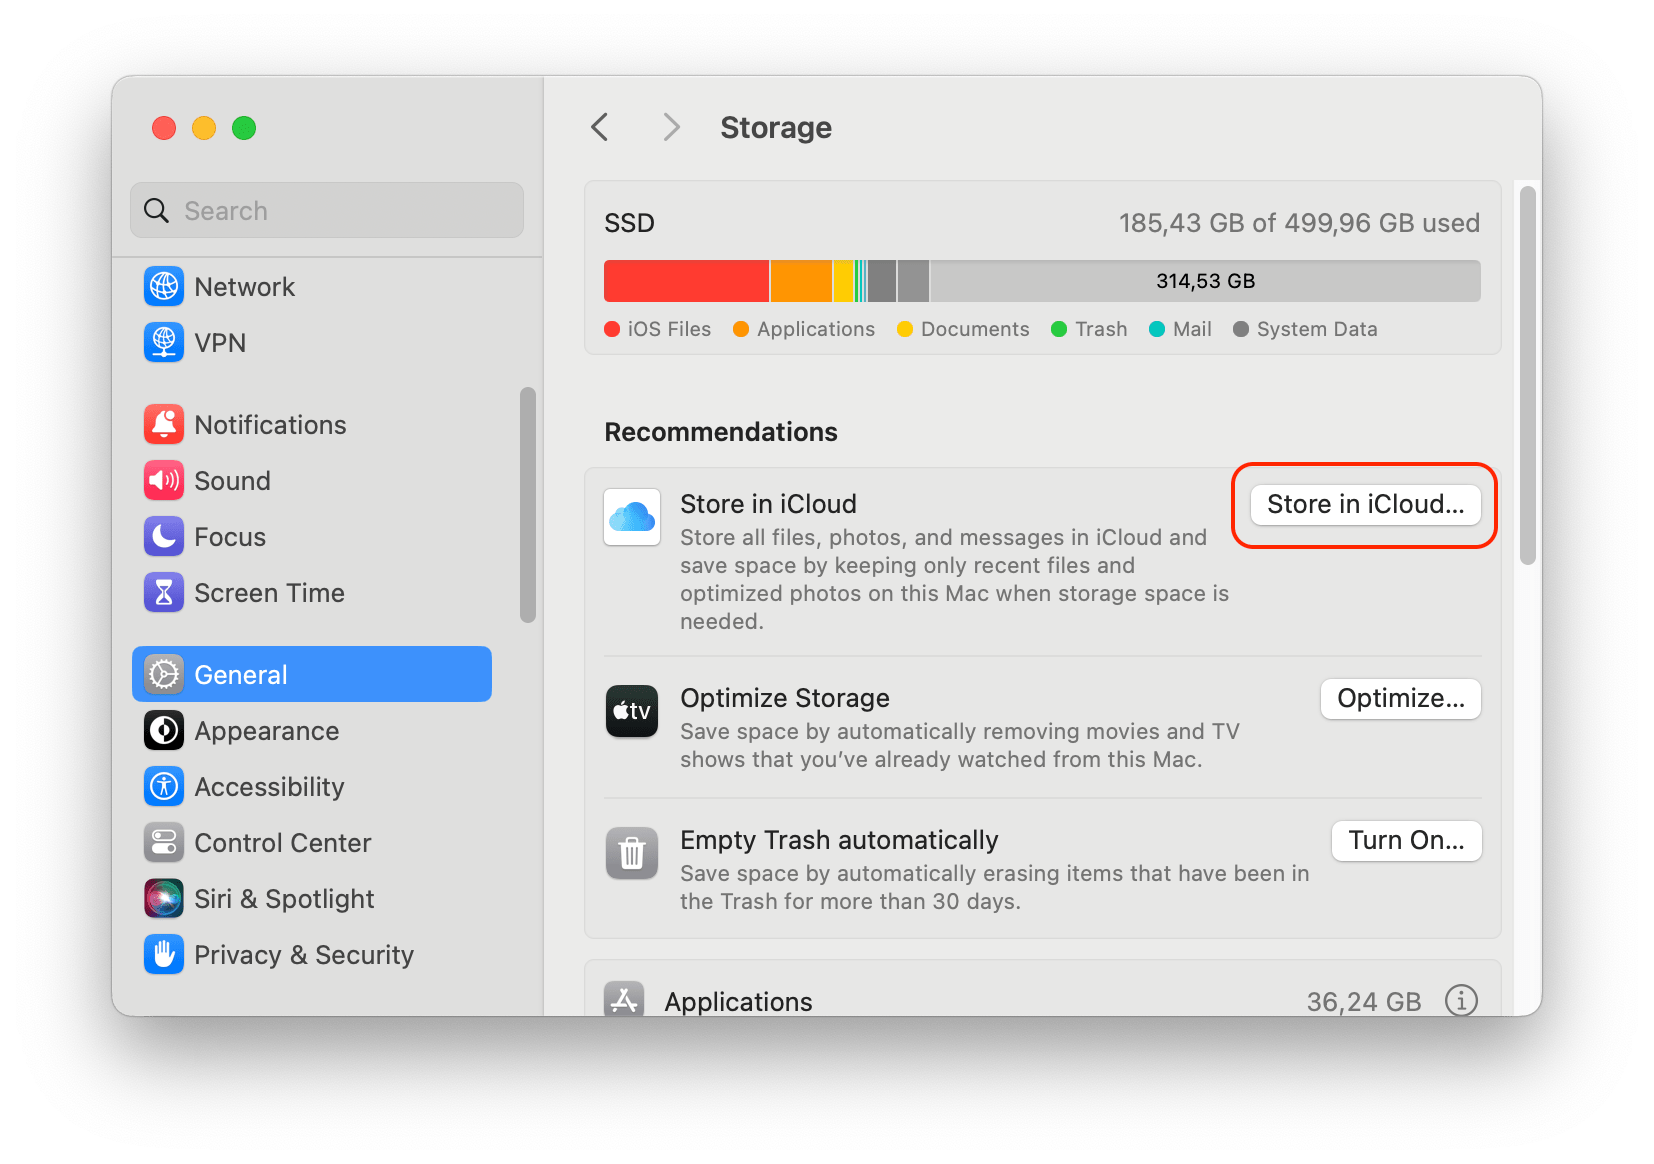
Once enabled, your system will continuously store files in iCloud as needed, preserving your startup disk space. Keep in mind that expanding your virtual drive may necessitate an upgrade to your iCloud storage plan.
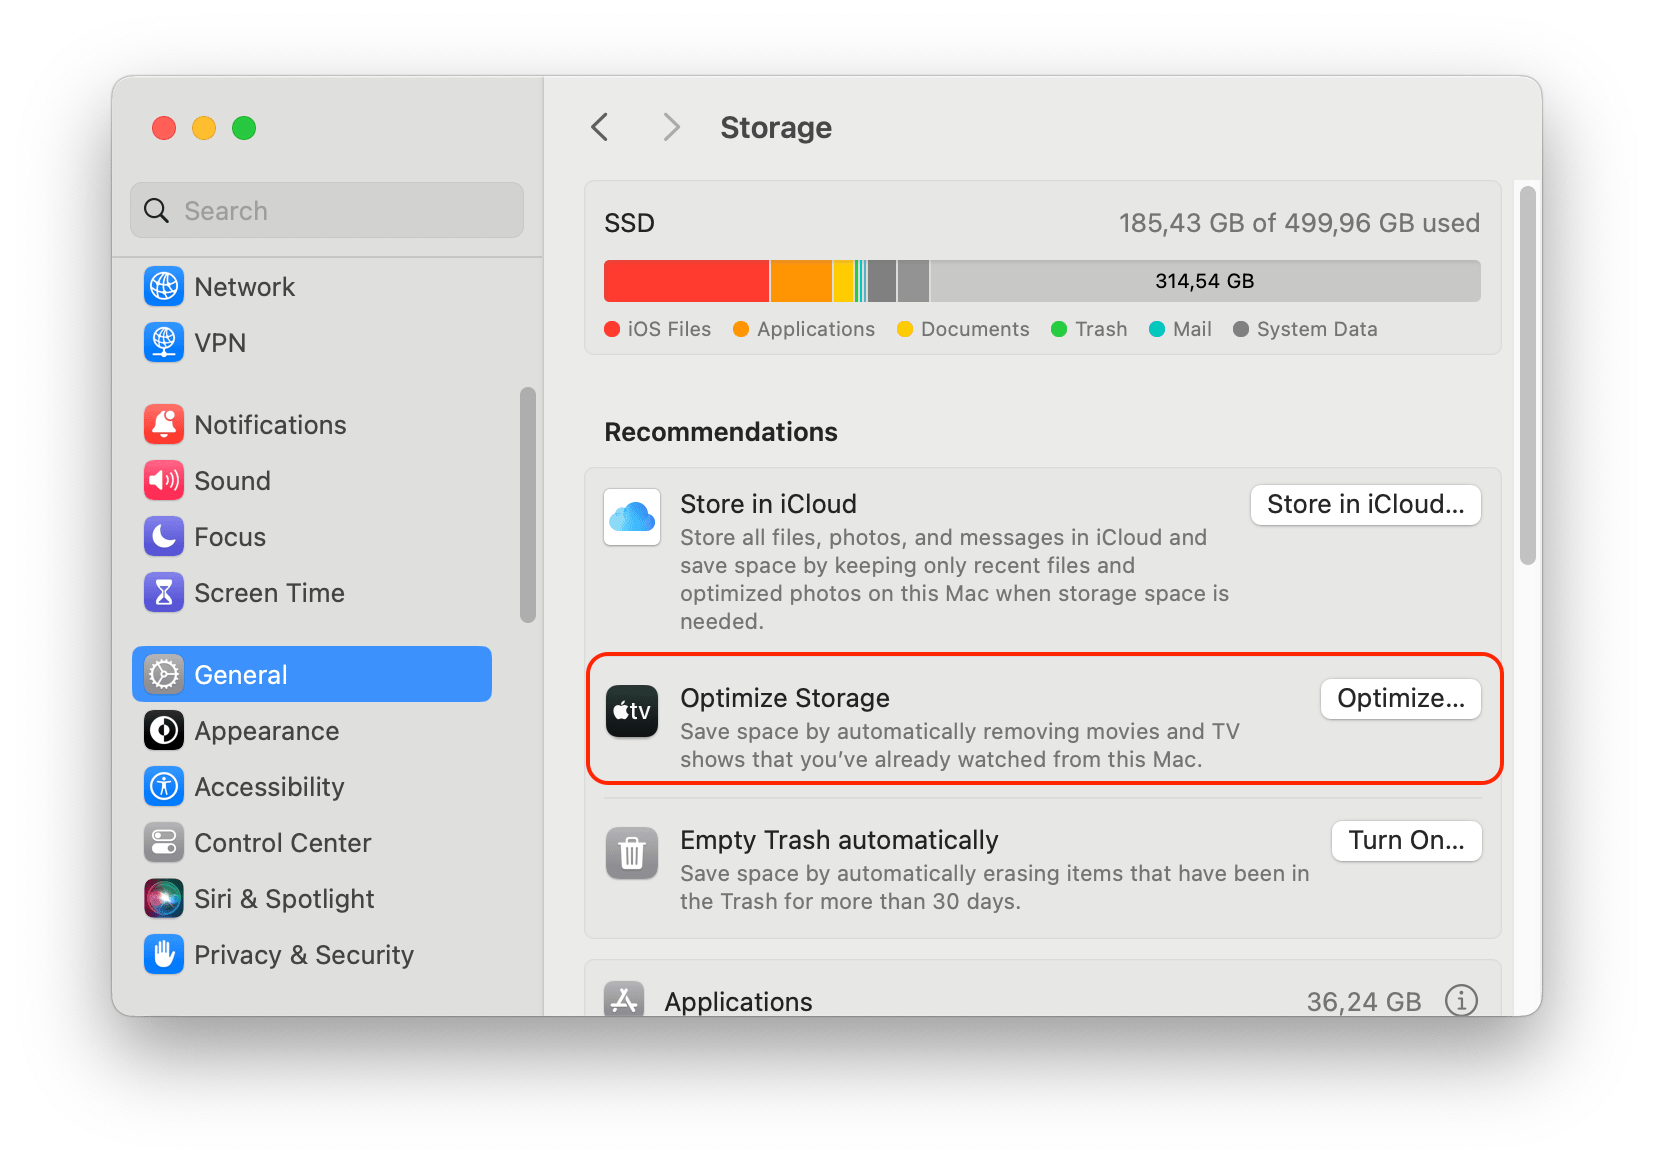
Leverage the “Optimize Storage” Feature
The “Optimize Storage” feature serves as a smart solution for analyzing and optimizing disk space on your Mac. It automates the process of moving photos, iTunes media, email attachments, and other files to iCloud when your storage is nearing capacity. To enable this feature, follow these steps:
- Open System Settings.
- Navigate to General → Storage.
- In the Recommendations section, click the “Optimize” button and confirm.
Enable Automatic Emptying of Trash
Many Mac users tend to overlook the fact that moving files to the Trash doesn’t permanently eliminate them. For users with limited disk space or memory, automating the removal of these files from the Trash is convenient. To enable the “Empty Trash Automatically” feature, follow these steps:
- Open System Settings.
- Navigate to General → Storage.
- Click the “Turn On” button next to the Empty Trash Automatically feature.
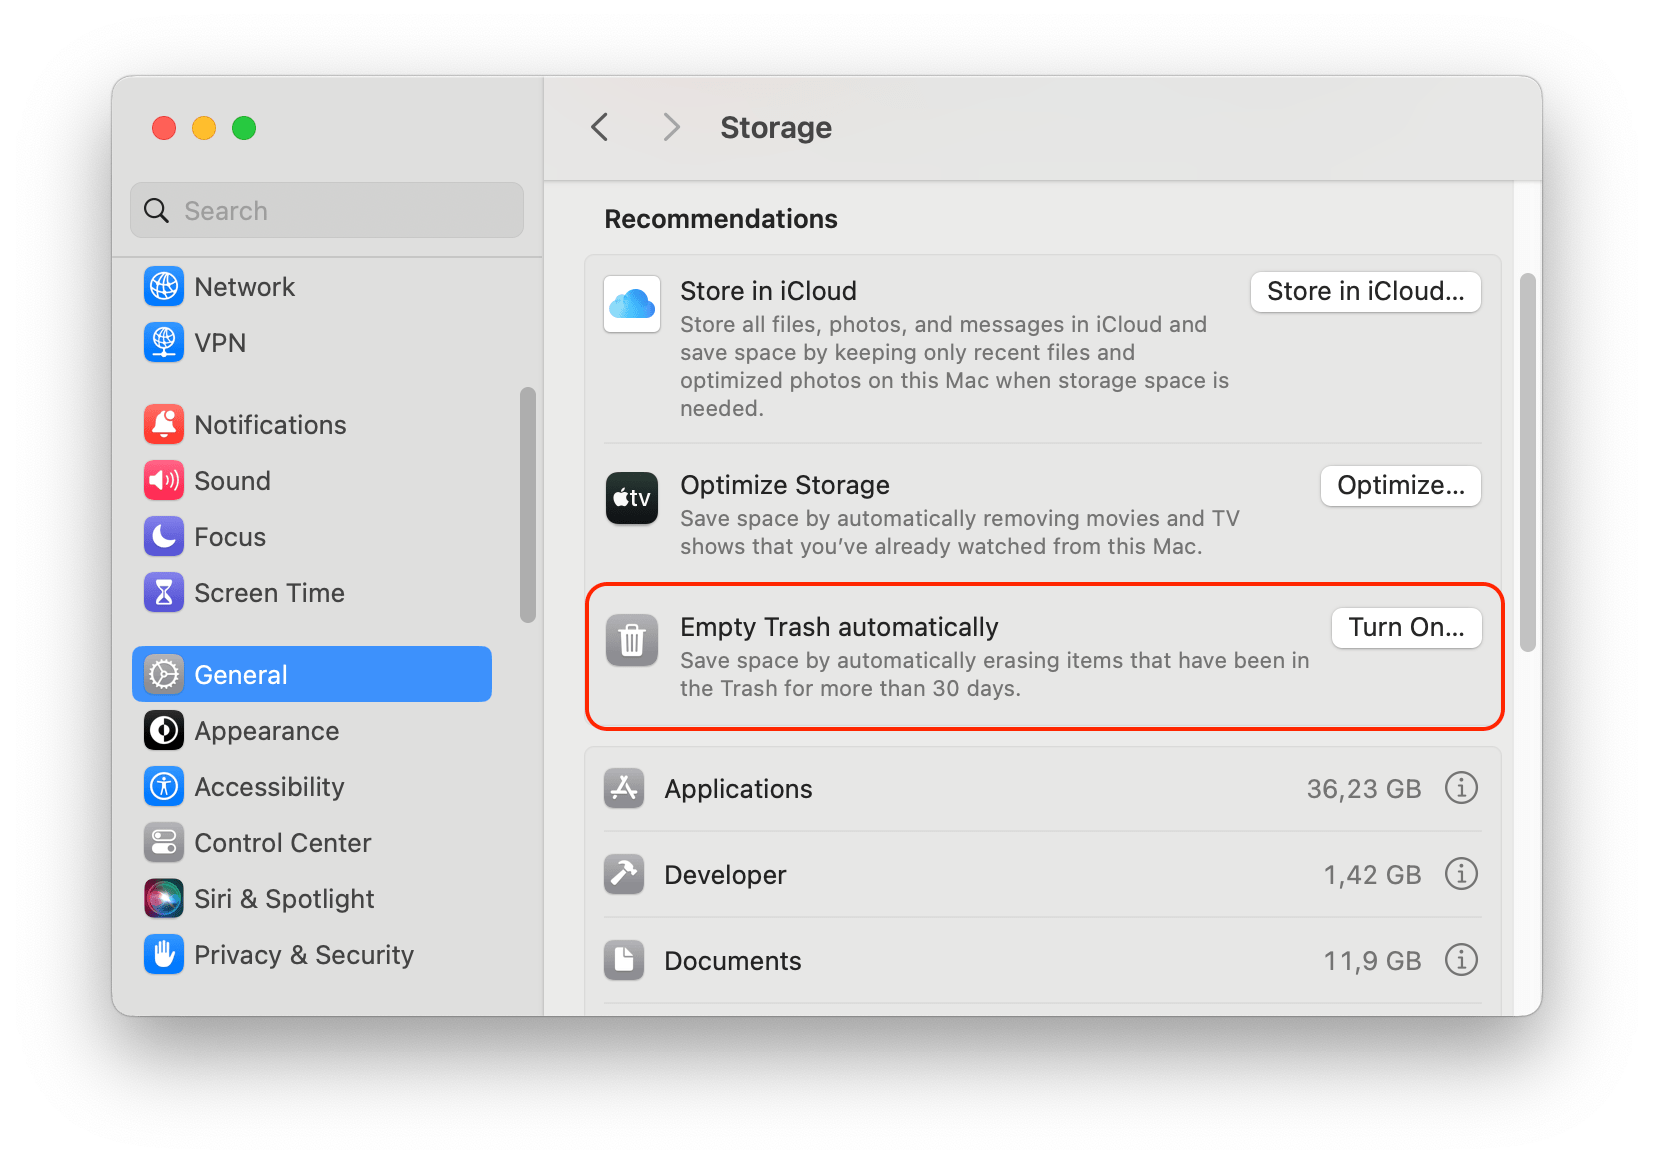
Once activated, files will be automatically removed from the Trash after 30 days, which is a helpful feature for those who forget about items in the Trash folder.
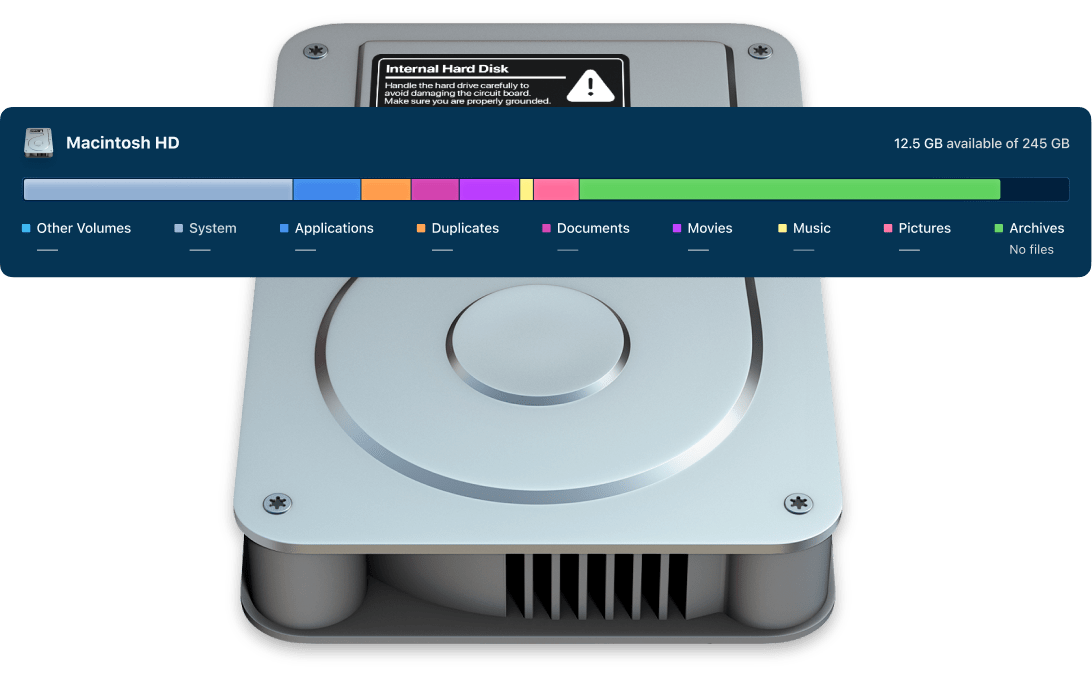
Control large files
The Storage section in System Settings simplifies the process of identifying and removing large files and other space-consuming data on your Mac. This feature provides a user-friendly interface, offering an organized view of all your files. To declutter your Mac, navigate the Storage section in System Settings and review the files that take up hige space on your Mac and which you no longer require.
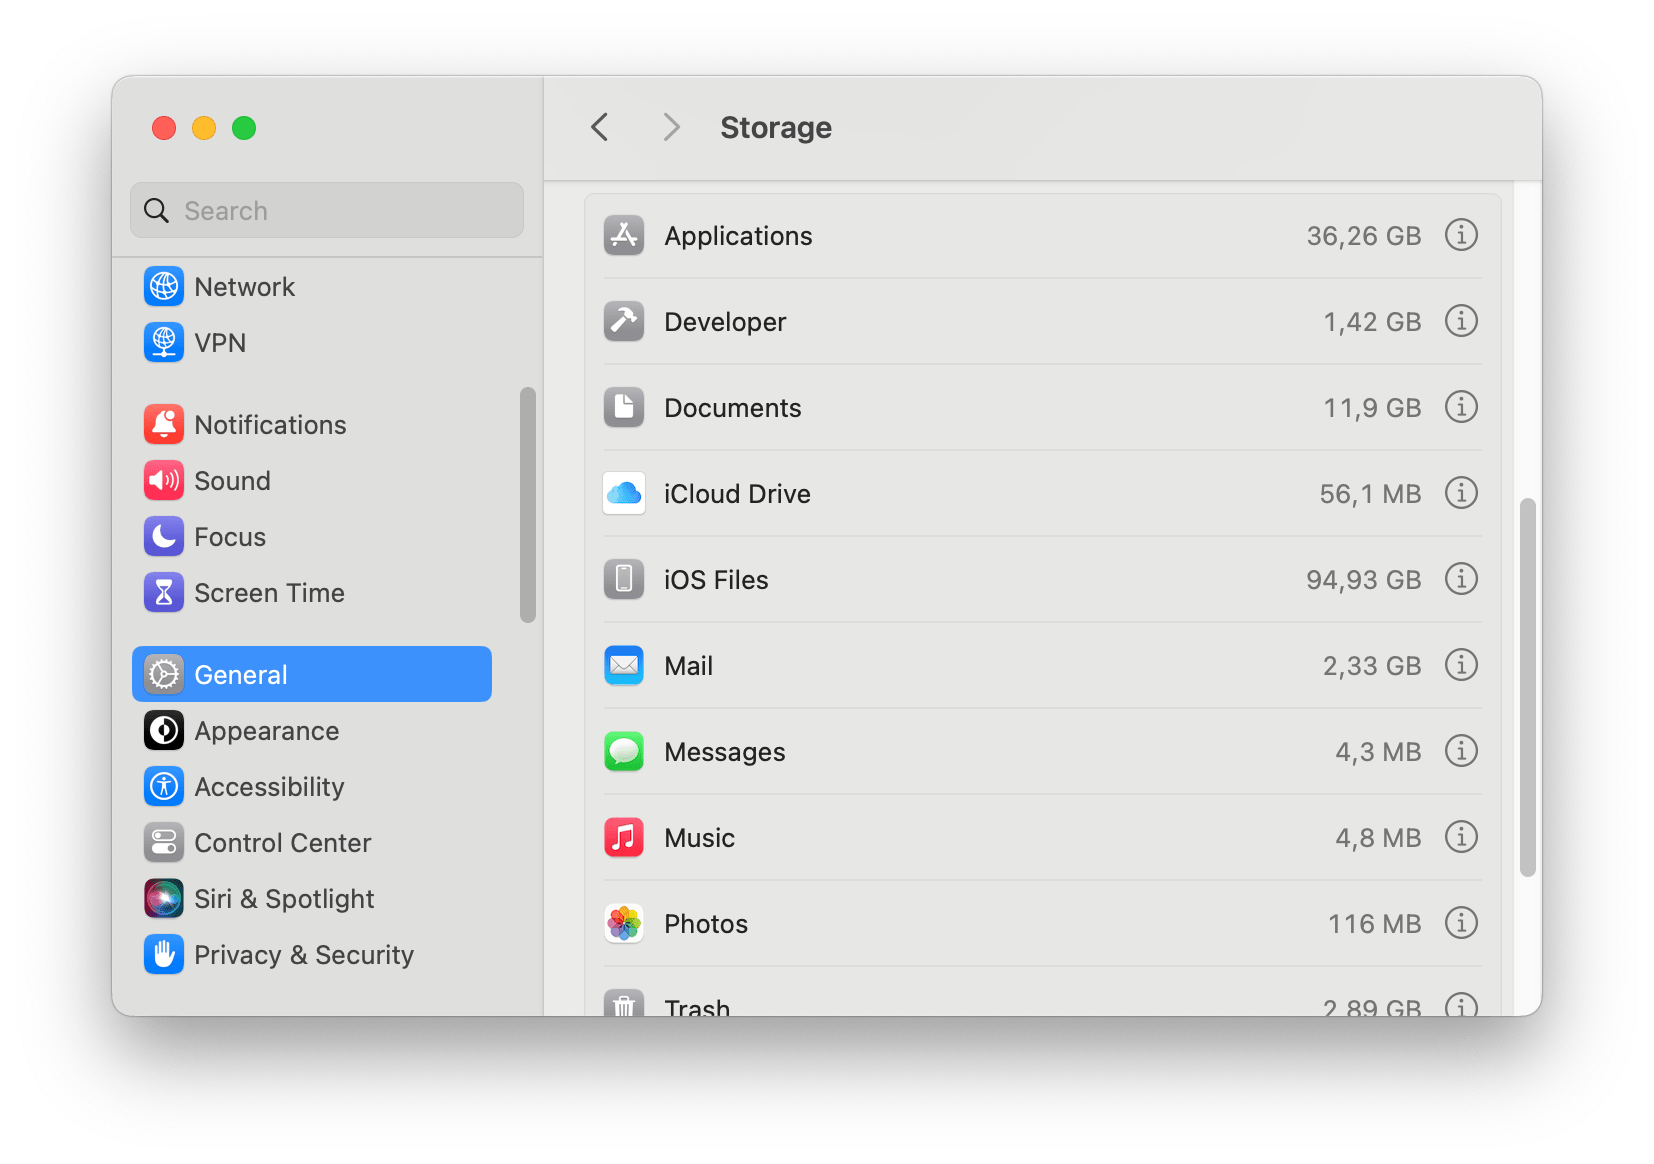
While the process is straightforward, please note that system files like cache, logs, and junk that accumulate automatically cannot be removed using this method.
Clear cache files
Cache files are temporary data stored by various apps and the operating system to speed up their processes. Over time, these files can accumulate and consume significant storage space, potentially slowing down your Mac. You can use the MacCleaner Pro application, which provides a user-friendly solution to this problem. It lets you quickly and safely remove unnecessary cache files with just a few clicks. Follow these steps:
- Run MacCleaner Pro.
- Switch to the Clean Up section in the left panel.
- Select caches and other junk files.
- Click the Remove button and confirm.
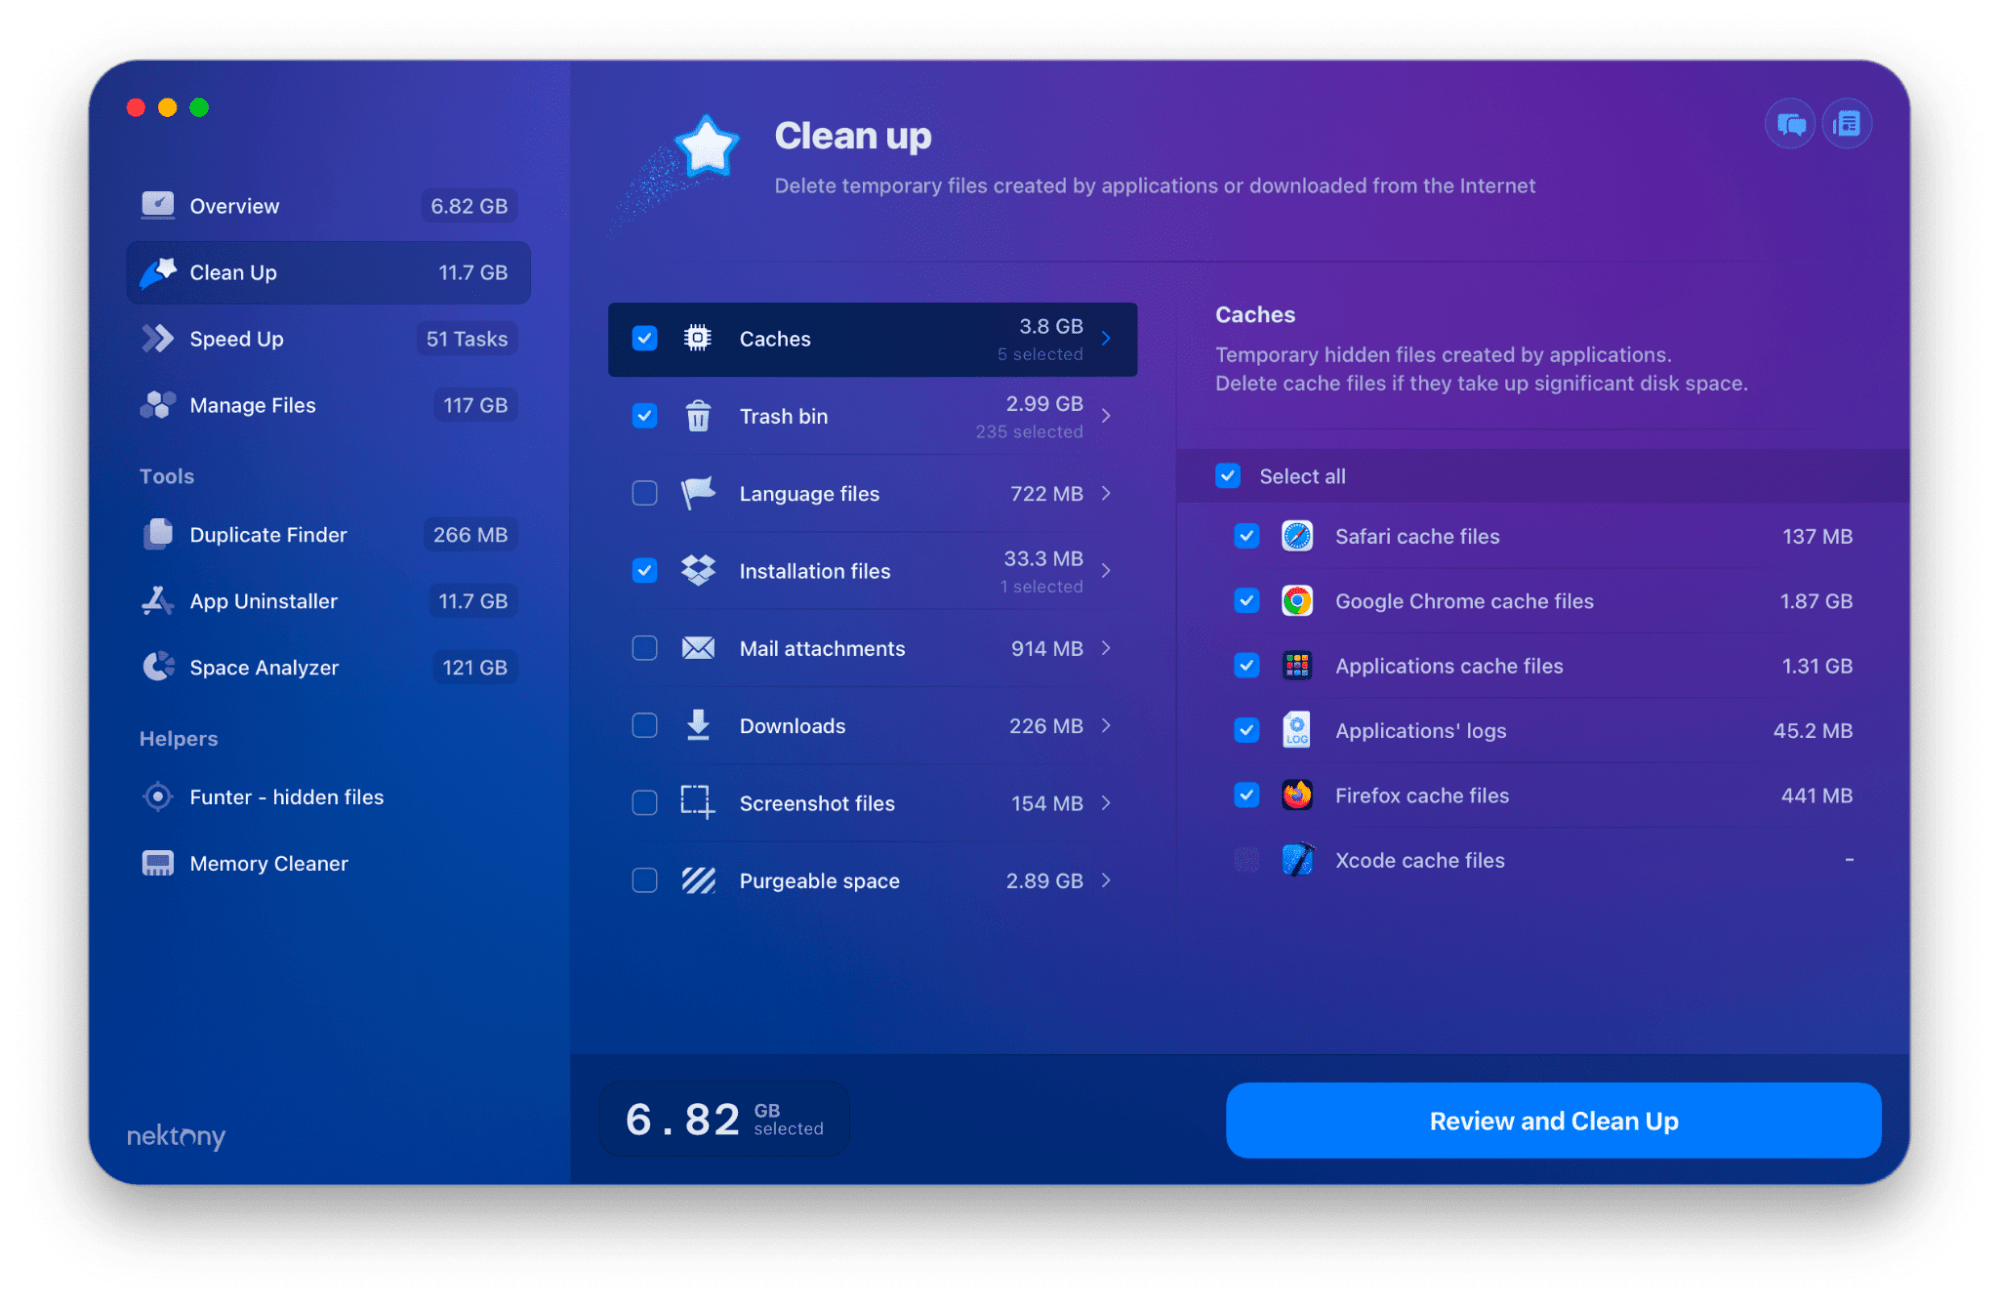
By regularly clearing cache files, you can free up valuable storage space, enhance system responsiveness, and ensure your Mac operates at its best, making it an indispensable tool for Mac users looking to keep their systems running smoothly.